I wasn’t sure where to start with my blog and then my oven blew up and honestly kids, it was quite traumatic! So, less of a blog, more of a public service announcement to share my experience in case anyone else finds themselves in the same position.
Picture the scene, it’s Wednesday afternoon and I’m getting a head start on my bakes that are all due to be collected on Friday. Then bang, noise from the oven and all my electrics went out. No bother I thought, I’ll just find what’s tripped and I can get on. Electricity restored I popped my next five layers in the oven. Except they didn’t bake. The oven is on, the light is on, fan is on but there’s no heat! Like any gen x, I google my issue – no bother says the internet, easy job, no need to get a professional out, anyone can DIY this job, there’s even a how to video – tripped electric plus no heat = broken oven heating element. Excellent news because I don’t have the time to get a new oven ordered and installed or wait for a tradesman to fix it.
So off I go to Amazon, search for oven heating element armed with my model number (you can find this on your oven manual or mine had a sticker inside the oven door), checked the prime box and £12 later I wait…

Obviously baking is now off so I get on with making decorations. Fast forward to Thursday afternoon and hurrah! Amazon arrives with my new oven heating element.
I turned the electric to the oven off – this is important, please don’t blow yourselves up! I watch the video again, armed with a cross head screwdriver, a light positioned to illuminate the inside of the oven and remove the door, the fan cover and the old heating element. The old connectors just pulled off – just make sure to make a note of which wire goes with what prong of the heating element. So far so good!
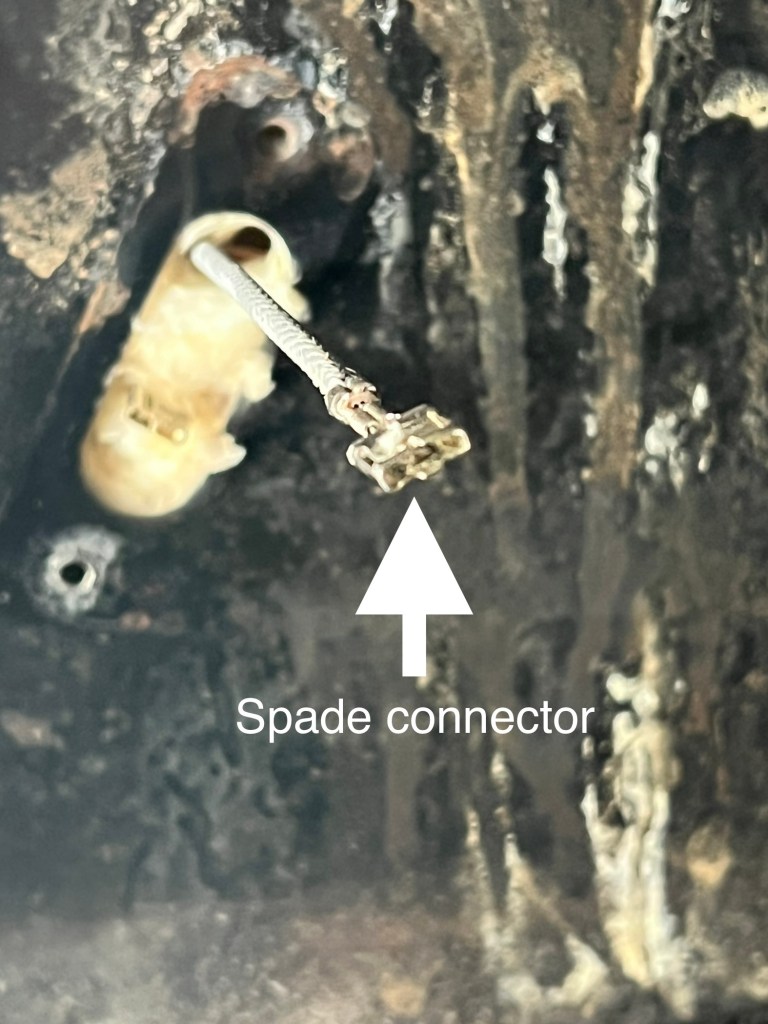
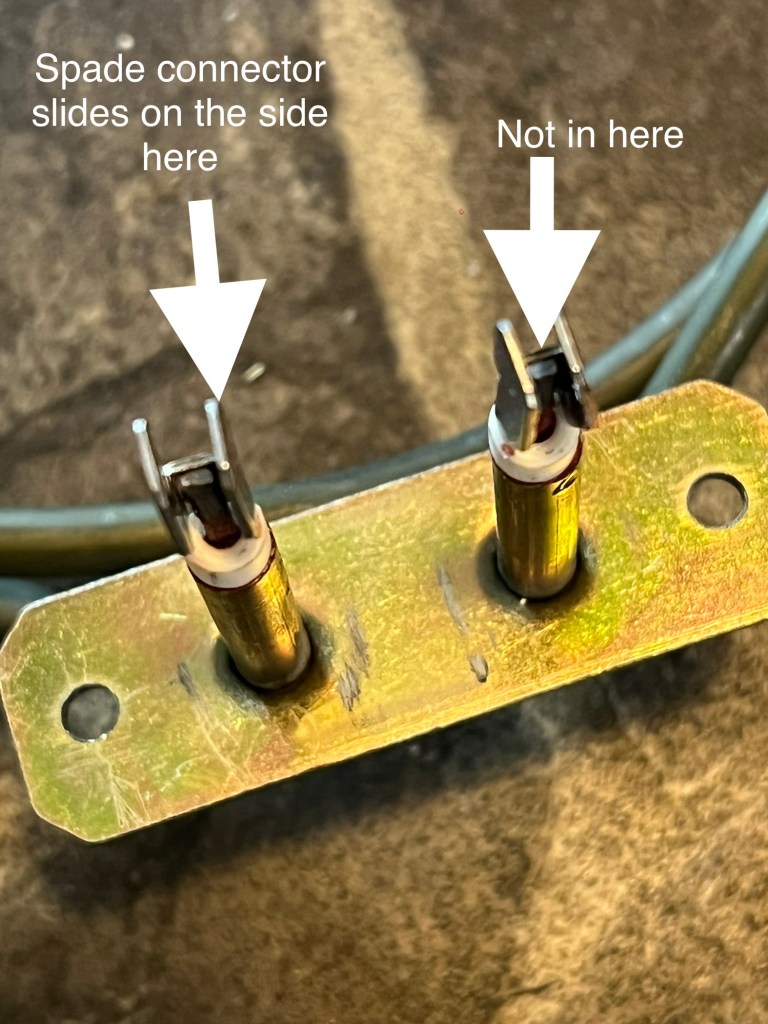
I go to reattach the new heating element. Balls. Because I couldn’t quite see the original connection I have no idea how the oven wire and the element connect up! I watch the video again – just connect it. Great, HOW? I google images and diagrams – nothing (which is why I’m sharing here!). I take the entire oven out and unscrew the back thinking I might be able to see better from the back. I call my Dad, send him photos and he says the same – just connect it. I still don’t know how. I call my friends husband, send him the images, he says the same. I try and connect the old element – they look exactly the same – I have no idea how this spade connector fits with the prongs on the heating element. I have a meltdown and a little cry – time is ticking!
And then it just clicks. I’d been trying to shove the spade connector into the middle of the prongs when all along it just slides onto one of the two prongs – it doesn’t even matter which one! And that kids is why I’m not an electrical engineer.
Anyway, each spade connector goes on one prong (why are there two?!), either side of the heating element.
I turn the electric back on before putting the oven back together (I’m not doing that twice), turn it on and it doesn’t blow up – SUCCESS!
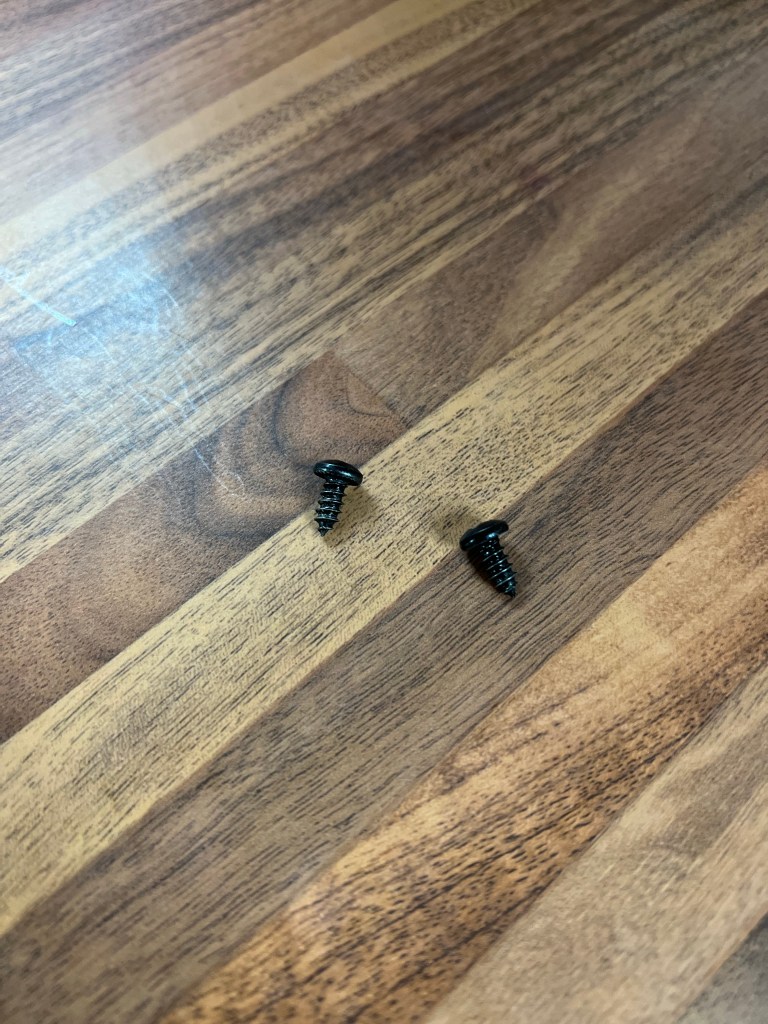
Once I put the oven back together I only had two leftover screws, obviously unnecessary…
It really is a simple job to replace the heating element in an oven – once you know how the connectors work – if I can do it, so can you!
I really hope this helps someone fix their oven quickly with less stress that I had – good luck!
Here’s some of the lovely bakes that all went out in time after not very much sleep